Tuesday, April 27, 2010

Personalized ball pillows, wrinkly toes and sweet treats.

So today I got to meet a very special someone. 

She has delicate eyelashes, wrinkly toes, and pudgy knees.  Oh, and she was only 17 hours old and her name is Maggie.  Precious. 

My good friend, Sarah, had her baby girl last night.  You can see other posts (here, or here) related to baby showers and baby gifts for this much-anticipated little girl.

I came home totally energized about the miracle of perfectly formed babies... and had to channel this energy somehow into something productive.  My husband can only hear about the wrinkly toes so many times before he is convinced that I am crazy.

So, I started with some of these....I like to call them boy cookies.  They are chocolate walnut.


And, while I was at it... why not make some girl cookies (white chocolate cranberry)...


And, who can resist a few more ball pillows.  Personalized with an 'm' for Maggie.  (See the first round of these adorable pillows here)


Let's get a little close up of the 'm' detail.  Aren't details the little things that make life happy? 


Yep, details make me happy.

And, to keep me focused a little longer, let's put it all together in a picnic basket with a personalized tag.


There we go.  Energy channeled into goodies for mom and baby.  I can't wait to secretly drop these off on the doorstep to greet mom, baby and dad as they arrive home from the hospital tomorrow.  :)  Hooray!

Friday, April 23, 2010

T-Shirt Blankets


If you are anything like me, you have tons of t-shirts sitting around that you hold onto for the sentimental reasons... but you just don't wear them anymore.  And, you have friends who have the same pile of t-shirts.

A few years ago I made a t-shirt blanket out of my pile of shirts... maybe that will make a later post.  And, this year for Christmas, I played crafting 007 to make a blanket for my best friend. 

I emailed my best friend's mom (her mom lives in TN) and asked if she could sneak the pile of t-shirts out of my best friend's house (which happens to be in FL) and send them to me (in MI).  It was a multi-state plot necessary to make a great Christmas present.

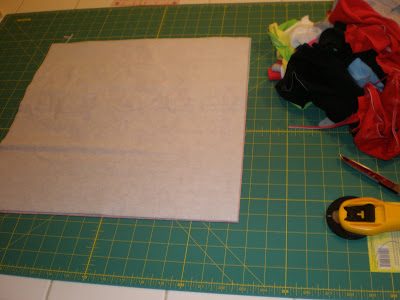
So, once the t-shirts arrived, it was time for the cutting, interfacing and sewing to begin!  I think I cut my interfacing in 16x16 in squares. (The blanket ended up being pretty much the size of twin-bed quilt.) Iron them onto the t-shirts, otherwise the t-shirt will stretch and pull every-which-way when sewing.


Once the interfacing is ironed on, cut the shirts to the size of the interfacing.


Once you get all the t-shirts prepped, you can begin to really personalize the blanket.  The pattern of shirts, the fabric used to outline the shirts (if any), and the thickness of your border can totally be up to you.

I followed the way I made my blanket - clean and simple with the fabric borders.  I like to add a little spice ot the back so that if you want, you can always flip it over and have a fun blanket.


There you have it!  A brand new blanket and perfect way to keep all those shirts lying around.

Fun, spunky, colorful, and cozy.  Perfect!

Tuesday, April 20, 2010

BALL PILLOWS!


I am so excited about this quick and easy project.  I love it.  It just makes me giggle, I think it's so sweet.

I have had a pattern and huge desire to make ball pillows for a long time now.  And, I just haven't found the time yet. 

So, last week when a friend dropped off flowers to me at work, I decided that she (or the baby girl in her belly) would be the first recipient of the ball pillow!  Sometimes it makes all the difference in the world to have flowers, a dog, and a pregnant belly to rub to brigthen your day.  And, since she is due THIS Friday, there is no time to waste with making these.

On Sunday when I sat down to this (with my flowers in the background, pattern tutorial on the computer, and sewing machine up and ready) - you know that makes for a great night!


I used this tutorial from the purl bee and made the size small ball.  It is so quick and easy, and makes a good size ball for a little one.  Here it is compared to my hand...


The steps were quick and straight forward:

Cut your peices (you'll need 8)


Sew your pieces together to form an inside out ball...


Turn it right-side out, stuff it, add the dots to the ends, and ENJOY!


These just tickle me so much.  I have decided that everyone needs a ball pillow.  How fun to have someone sit down on your couch and have a ball pillow.  I think I'll be trying the size large ball pillow soon.